Japanese tabletop grilling works best when the setup is simple: thin slices, a hot surface, a few vegetables, and a sauce that sharpens rather than hides the meat. This guide covers the equipment, the best cuts to buy in the UK, how I build a quick tare, and the cooking habits that keep the meal lively instead of fussy. If you want a reliable way to recreate yakiniku at home, the details here are the ones that actually matter.
The quickest route to a good grill-at-the-table dinner
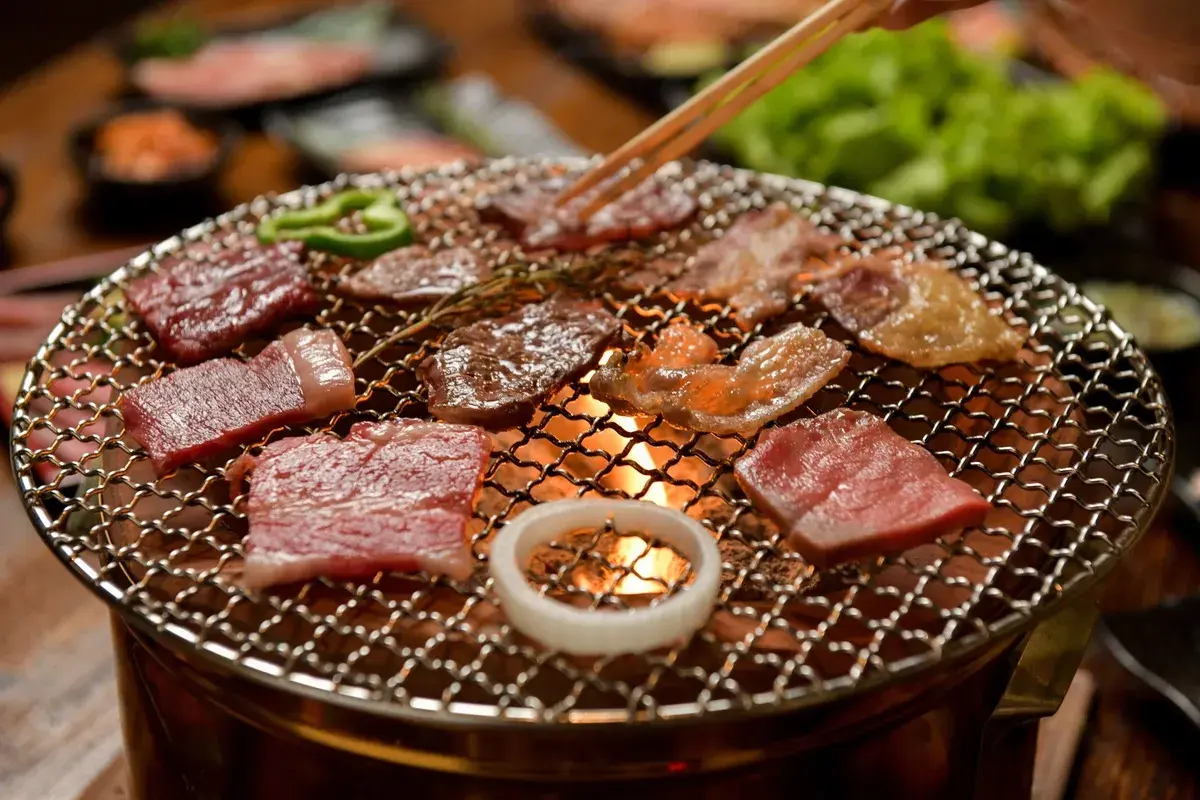
- Use thinly sliced beef, pork, or chicken so everything cooks in under a minute per side.
- Choose an electric grill, cast-iron grill pan, or tabletop gas setup based on smoke, space, and how often you will use it.
- Keep the sauce balanced: soy, mirin, garlic, ginger, and a little sugar do most of the work.
- Cook in small batches and keep lean cuts separate from fatty ones so the grill stays clean-tasting.
- Serve rice, lettuce, pickles, and one or two fresh sides rather than trying to build a huge spread.
That is the short version. The real difference between an ordinary grilled-meat dinner and a proper Japanese-style one is rhythm: prep everything first, then cook little and often so every bite lands hot and fresh.

Choose equipment that suits your kitchen
You do not need a specialist restaurant rig to make this work well. What you do need is steady heat, a surface that browns quickly, and a setup that does not turn your kitchen into a smoke alarm experiment.
| Equipment | Why it works | Best for | Limits |
|---|---|---|---|
| Portable electric grill | Even heat, easy table use, predictable temperature | Most homes, especially flats and smaller kitchens | Less smoky flavour than charcoal |
| Cast-iron grill pan | Strong sear, easy to buy, good browning | One or two people, quick weeknight dinners | More contact with the food, less of the social table-grill feel |
| Electric hotplate or griddle | Large surface, easy batch cooking | Small gatherings and mixed meats | Can steam food if overcrowded |
| Charcoal grill outdoors | Best aroma and char | Garden cooking, summer meals, longer sessions | More setup, more smoke, not ideal indoors |
For a UK kitchen, I usually recommend an electric grill or a heavy cast-iron pan first. They are far less awkward than charcoal, and they let you focus on the meat rather than fighting the heat. If the surface is not properly hot, the whole meal loses momentum.
One practical detail matters more than people expect: ventilation. Open a window, turn on the extractor, and keep the surface clean between batches. Once that is sorted, the next decision is the food itself, because the best grill cannot rescue the wrong cut.
Pick cuts and vegetables that cook fast
Yakiniku is built around thin slices, not big slabs. That matters because the goal is a quick sear, not a long roast. In the UK, I would look for cuts that are already tender or that become tender when sliced thinly against the grain.
| Ingredient | What to ask for | Why it works | My note |
|---|---|---|---|
| Beef short rib | Boneless short rib, rib cap, or thinly sliced rib-eye | Rich, fatty, fast to brown | Ideal if you want the most satisfying bite |
| Sirloin or striploin | Thin slices, 3-5 mm | Balanced flavour with enough fat to stay juicy | A good everyday option if wagyu is not on the cards |
| Skirt or bavette | Very thin slices cut across the grain | Strong beef flavour | Excellent, but only if you slice it properly |
| Pork belly | Thin rashers, cut into bite-size pieces | Fast cooking and forgiving | Great for mixed grills |
| Chicken thigh | Boneless thigh, sliced thin | Stays juicy on a hot grill | Use thinner cuts than you would for a pan roast |
| Mushrooms, onions, cabbage, courgette, peppers | Bite-size pieces or slices | Soak up sauce and balance the meat | Use a mix of textures, not just one vegetable |
If you cannot buy pre-sliced Japanese-style meat, chill the steak in the freezer for 20 to 30 minutes, then slice it yourself as thinly as you can. That trick makes a bigger difference than most people expect. I also cut against the grain whenever the cut is a little firmer, because it keeps each bite easier to chew.
For vegetables, I would keep the choices simple and grill-friendly. Shiitake, king oyster mushrooms, onion wedges, cabbage, asparagus, courgette, sweetcorn, and thin slices of squash all work well. If kabocha is hard to find, butternut squash is the closest everyday substitute in the UK. The point is not to build a perfect replica of a restaurant menu; it is to choose ingredients that cook fast and hold their shape.
Once the meat and vegetables are chosen, the sauce becomes the thread that ties everything together.
Make a tare sauce that lifts the meat
Traditional yakiniku relies on dipping sauce rather than heavy marinating. That gives you more control: each bite can taste a little different, and the grill still stays front and centre. I prefer a sauce that is sweet-savoury, a little garlicky, and not too thick.
| Dipping style | Flavour | Best with | Why I use it |
|---|---|---|---|
| Tare | Soy, mirin, sugar, garlic, ginger, sesame | Beef, pork, mushrooms | The classic all-round option |
| Salt and lemon | Bright, clean, lighter | Fatty beef and pork belly | Stops richer cuts from feeling heavy |
| Miso-based dip | Deeper, earthier, slightly thicker | Pork, chicken, mushrooms | Useful when you want more depth without more sweetness |
The main rule is easy: dip after grilling, not before. A heavy marinade can mask the meat, and too much sugar can burn on the grill. Keep the meat mostly plain, then let the sauce finish the job at the table. That leads naturally into the part where many home cooks lose control of the dish: the actual cooking.
Cook in small batches and keep the heat moving
Yakiniku looks casual, but it depends on discipline. The grill must be hot, the batches must stay small, and the food needs to move from fire to plate without sitting around.
- Preheat the grill or pan until it is properly hot, then brush or wipe on a little neutral oil.
- Lay out the ingredients in separate piles so meat, vegetables, and sauces do not mix before cooking.
- Cook in a single layer with space between pieces. If you crowd the surface, the food steams instead of browning.
- Start with leaner cuts, then move to fattier ones. That keeps the grill tasting clean for longer.
- For very thin beef, 30 to 45 seconds per side is often enough. Thicker or firmer pieces need longer, especially chicken.
- Transfer finished pieces to the plate immediately and dip while they are still hot.
I also keep separate tongs or chopsticks for raw and cooked food. It is a small habit, but it keeps the meal cleaner and easier to manage. If the grill starts to collect burnt fat, wipe it down quickly between batches or move to a fresh section of the surface.
The other thing I watch closely is timing. Thin beef can go from ideal to dry in a very short window, and chicken needs to be fully cooked without being left on long enough to toughen. If you are unsure, cook in smaller pieces rather than larger ones. Small portions are not just more authentic; they are easier to control.
Once the grill rhythm feels right, the meal starts to become less like a recipe and more like a shared table routine. That is where the sides matter.
Serve it like a real meal, not just grilled meat
A good home yakiniku spread does not need a dozen extras, but it does need a few fresh elements to balance the richness. I usually aim for one staple, one crisp side, and one sharp or pickled element.
| Side | Why it works | Prep time |
|---|---|---|
| Steamed short-grain rice | Gives the meal structure and softens richer bites | 10 to 25 minutes, depending on your method |
| Lettuce leaves | Useful for wrapping fatty meat and sauce together | 5 minutes |
| Shredded cabbage | Crunchy, cheap, and good with sesame dressing | 5 to 10 minutes |
| Quick cucumber pickle | Adds acidity and keeps the meal from feeling heavy | 10 minutes |
| Miso soup | Rounds out the meal without competing with the grill | 10 to 15 minutes |
| Edamame | Easy to serve, easy to snack on between rounds | 5 to 8 minutes |
As for drinks, cold green tea, lager, or a light beer all fit the meal well. The key is not the exact pairing; it is keeping the drinks clean and refreshing so they do not fight the sauce.
What makes the meal feel right from start to finish
The details that matter most are usually the boring ones: thin slicing, proper heat, enough ventilation, and a little patience between batches. I would rather see a simple pan used well than an expensive grill used carelessly. The dish rewards restraint more than effort.
If I had to leave you with one practical rule, it would be this: prep everything before the first piece of meat hits the heat, then cook in small waves and eat immediately. That rhythm is what gives the meal its energy. It is also why the best versions of this style feel relaxed without ever becoming messy.
For the cleanest result, keep the grill uncluttered, the sauce on the side, and the menu short enough that you can actually enjoy the cooking. Do that, and the result will feel less like a workaround and more like a proper Japanese barbecue night at home.