Salmon shioyaki is one of the cleanest ways to cook fish: salt, heat, and good salmon doing the work. I like it because the dish looks minimal, but the difference between ordinary and excellent comes down to details such as salt level, resting time, and grill heat. In this article, I break down what makes it work, how I make it at home, what to serve with it, and the mistakes that usually flatten the result.
What matters most before the fish hits the grill
- Use skin-on salmon fillets; centre-cut pieces cook more evenly than thin tail ends.
- A dry brine is the heart of the dish: salt the fish, rest it, and let the flesh firm up.
- For a dinner version, 1.5-2% salt by fish weight is a sensible starting point; a more traditional cure goes higher.
- A hot oven grill gives you crisp skin in roughly 7-10 minutes, depending on thickness.
- Serve it with rice, miso soup, and one sharp or pickled side so the salt does not feel heavy.
Why this salt-grilled salmon works so well
I think of this dish as more than a recipe; it is a method that lets the fish speak for itself. The salt seasons the flesh, pulls out excess moisture, and gives the salmon a firmer bite, while the heat concentrates flavour and turns the skin deeply savoury. That is why it feels at home as a breakfast fish in Japan, a bento main, or a quiet weeknight dinner in the UK.
In Japanese kitchens it is usually called shiozake, and the logic is simple: a well-salted fillet brings umami, the savoury depth that makes plain rice feel finished, without any sauce at all. The trick is restraint, not complexity.
Once you understand that balance, the next decision is salt: how much, how long, and how far you want the cure to go.
How I salt it for the right balance of flavour and texture
I prefer to weigh the fish and salt by percentage instead of guessing. That sounds fussy, but it is the easiest way to avoid a fillet that is either bland or aggressively salty, especially when supermarket salmon in the UK is thicker and fattier than the leaner cuts this dish often uses in Japan.
| Style | Salt by weight | Salt for 300 g fish | Rest time | Result |
|---|---|---|---|---|
| Light dinner version | 1.5-2% | 4.5-6 g | 20-40 minutes | Clean, juicy, lightly seasoned |
| Classic home version | 3-4% | 9-12 g | 4-12 hours | Firmer, balanced, most weeknight-friendly |
| Stronger preserved style | 5% | 15 g | Overnight | Noticeably salty, dense, closer to a traditional breakfast fish |
My practical rule: for a quick dinner, I stay at the lower end and rest the fish for less time; for a more traditional result, I let it sit longer and use a little more salt. Dry brining simply means salting the fish and leaving it to rest so the seasoning penetrates while the surface dries enough to brown properly.
If the fillets smell a bit strong, I sometimes wipe them with a little sake before salting, but I treat that as an optional polish rather than a requirement. I also use fine salt for consistency, because flaky salt is harder to judge by eye. That dry surface is what makes the grill work, which is why the next step matters more than people think.
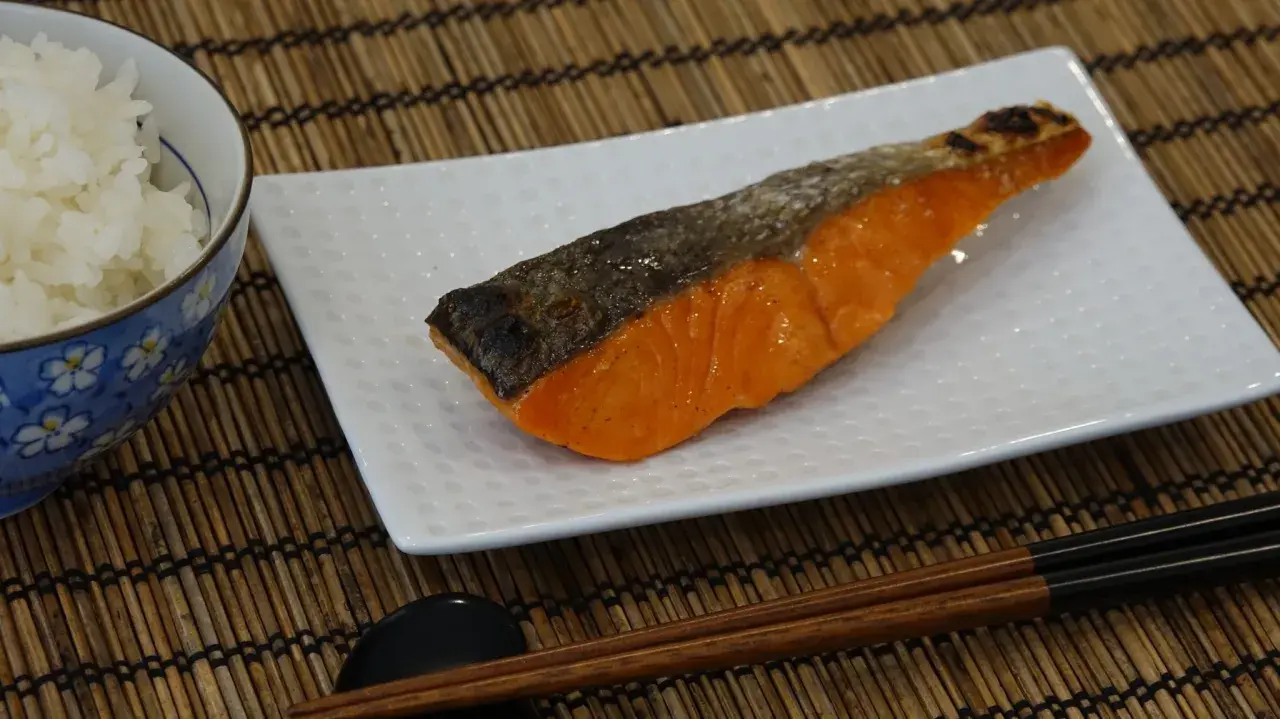
The grill method that gives crisp skin without drying the flesh
For a home kitchen, I use a hot oven grill or broiler on a foil-lined tray. A skin-on fillet of about 150 g usually needs roughly 7-10 minutes total under strong heat, while thicker pieces can take a couple of minutes longer; the goal is opaque flesh that flakes cleanly and skin that blisters, not a dry centre.
- Pat the salted salmon dry before cooking so the surface browns instead of steaming.
- Place it skin-side up under a very hot grill, about 10-12 cm from the heat source.
- Watch closely after minute 6, because the jump from golden to overdone can be fast.
- Rest it for 2 minutes before serving so the juices settle.
I skip oil here; a dry surface browns better and keeps the skin crisp instead of greasy. If I want a slightly softer finish, I pull it the moment the thickest part turns opaque and flakes with gentle pressure. If I want the skin extra crisp, I give it one more minute, but I never walk away at that stage. If you use a thermometer, 63°C at the thickest point gives a clear safety target. The whole dish depends on restraint, and that leads straight to how I build the plate around it.
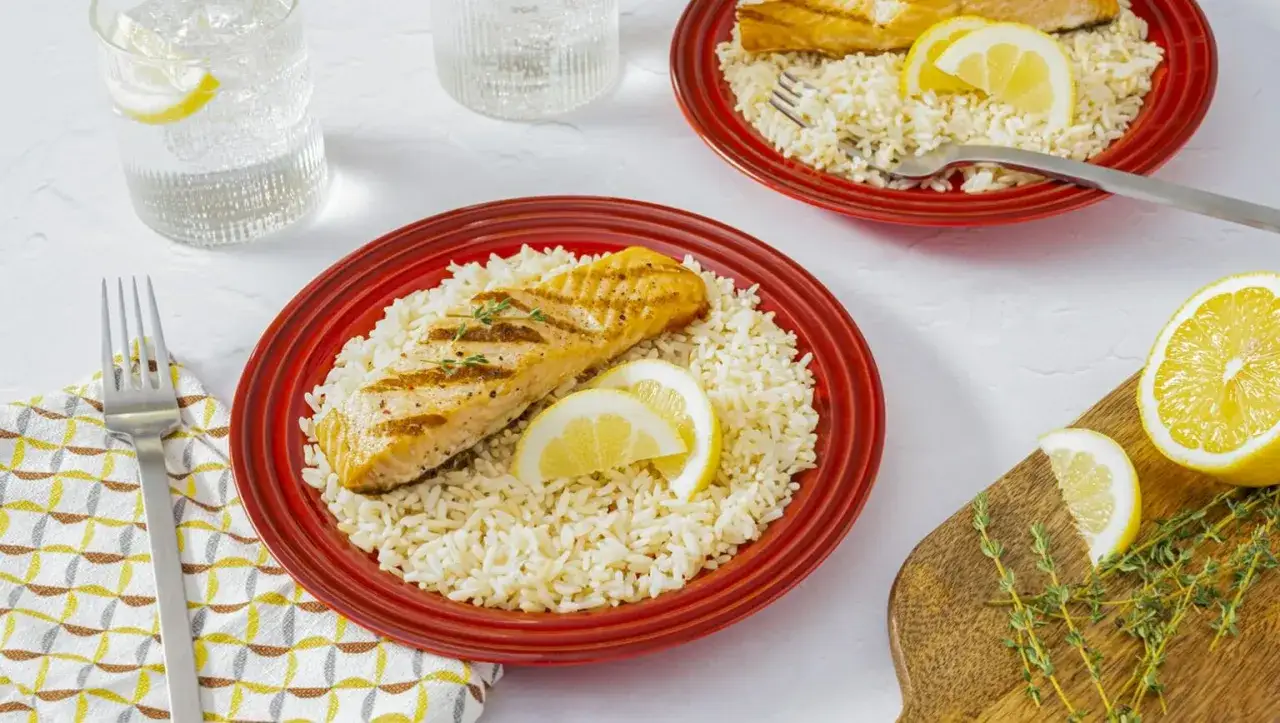
The sides that turn it into a proper Japanese main dish
The fish tastes best when the rest of the meal stays quiet. I usually pair it with steamed short-grain rice, miso soup, and one sharp side such as quick-pickled cucumber, daikon, or a little grated daikon on the side. The acid and crunch keep the salt from feeling flat, and the rice gives the dish its usual Japanese rhythm.For a dinner plate
- Steamed rice, or medium-grain rice if Japanese rice is unavailable locally.
- Miso soup or a light clear broth.
- One pickled or acidic side, such as cucumber, daikon, or cabbage.
- One green vegetable, such as spinach, broccoli, or sautéed cabbage.
If I am building the plate for one person, I usually aim for 120-150 g of salmon. For a more traditional Japanese breakfast style, 80-100 g is plenty, especially when the rest of the meal includes rice and vegetables.
Read Also: Nobu Miso Black Cod - Master the Restaurant Dish at Home
For a bento box
- Rice packed while still warm, but not steaming.
- A slice or two of tamagoyaki.
- Blanched greens or sesame spinach.
- Small pickles kept in a separate corner so they do not wet the rice.
Let the fish cool before packing it, because trapped steam softens the skin and can make the rice wet. A medium-grain rice works best if short-grain Japanese rice is not available in your local UK shop.
When the supporting pieces are this simple, the real risk shifts from flavour to technique, so it is worth calling out the mistakes that most often spoil the result.
The mistakes that matter most
- Using too much salt on thick fillets. If the fish is broad and fatty, start lower and taste the result before increasing the cure next time.
- Skipping the drying rest. Wet skin steams, and steamed skin never gets the crispness that makes the dish memorable.
- Cooking on medium heat. This recipe wants a strong, fast blast of heat; gentle cooking usually leaves the surface pale.
- Flipping the fillet too often. One careful turn is enough in most home setups, and sometimes none at all if you broil skin-side up.
- Adding soy sauce, sugar, or a heavy marinade. At that point you are making something else, and the clean salt-grilled character disappears.
I am strict about one thing here: if the fish tastes right before you add any garnish, you are already close. Lemon, grated daikon, or a few sesame seeds can finish the plate, but they should not be doing the job of the fish itself. From there, the remaining question is what to do with the extra fillets, because this dish is unusually good at paying you back the next day.
What I do with the extra fillets after dinner
I usually make two fillets at once. If I know I will not cook them right away, I salt them, chill them, and freeze the uncooked portions individually so I can pull out exactly what I need later. Cooked salmon is best used within 2 days in the fridge, so I treat leftovers as something to repurpose, not to forget.
That repurposing is where the dish becomes especially useful: flake it into onigiri, add it to ochazuke, layer it into a lunch rice bowl, or eat it cold with cucumber and a little sesame. For me, that is the real appeal. It starts as a restrained plate of salt-grilled salmon, but it quietly gives you a main dish, a bento filling, and a practical leftover strategy with very little extra work.