This umeboshi recipe follows the classic salted-plum method: ripe ume are layered with coarse salt, left to release their own brine, then dried in the sun until they turn wrinkled, glossy, and intensely savoury. I focus on the parts that matter most for a reliable batch: the right fruit, the correct salt ratio, the optional red shiso stage, and the small hygiene habits that prevent spoilage. I also keep it practical for a UK kitchen, where fresh ume and sunny drying days are both seasonal advantages rather than guarantees.
What matters most before you start
- Use fully ripe yellow ume if you want the traditional result; slightly green fruit should be ripened first.
- Keep the salt at 18% of the fruit weight for a shelf-stable batch.
- Red shiso is optional, but it adds the classic colour and a deeper aroma.
- Expect the process to take about four to six weeks before ageing, depending on weather and shiso timing.
- In the UK, treat fresh ume as a seasonal specialist ingredient rather than a supermarket staple.
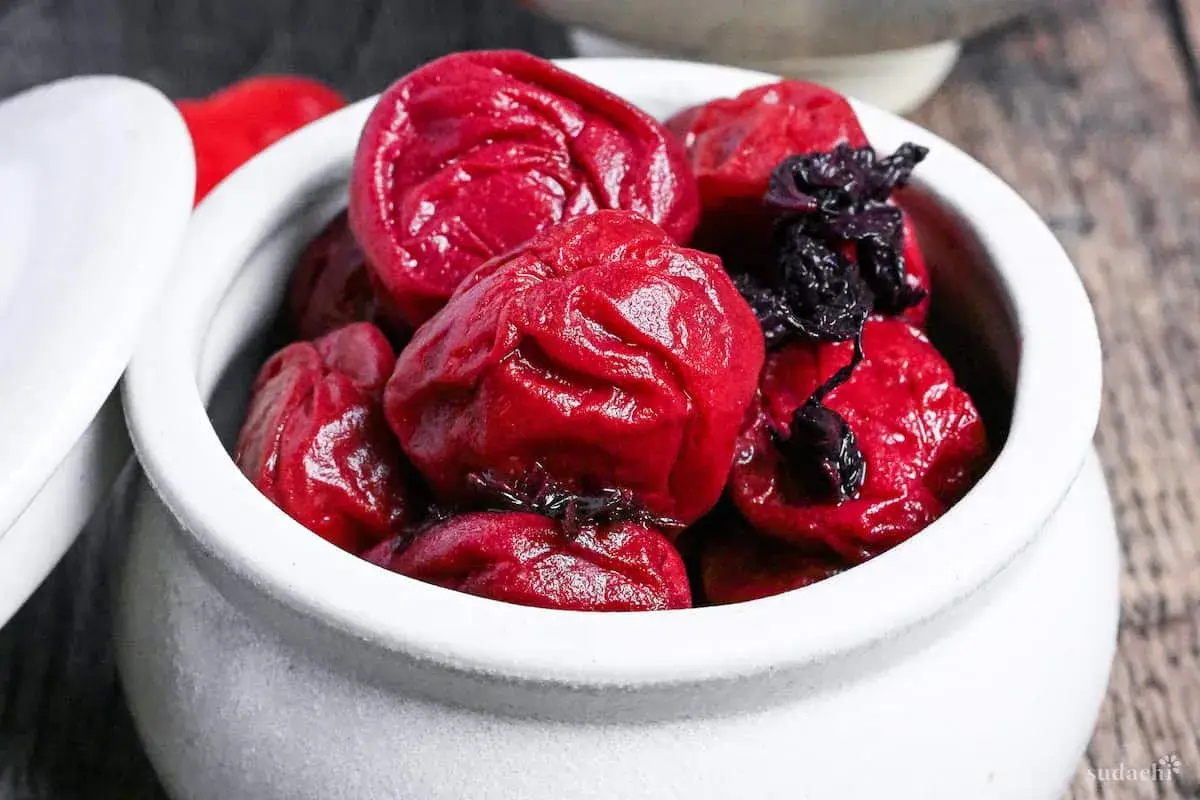
- The drying stage is not decorative; it is what gives the pickle its concentrated flavour and wrinkled texture.
What this pickle actually is and why the salt ratio matters
Umeboshi is not a quick pickle and it is not meant to taste gentle. The fruit is packed with salt, left under pressure until the liquid rises naturally, and then dried so the flavour becomes sharper and more concentrated. That process creates the bold sour-salty profile that makes umeboshi such a useful condiment with plain rice, rice balls, soups, and bento.
The salt level is the part I would never treat casually. Traditional batches usually sit around 18-20% salt by weight, and that is doing more than seasoning the fruit: it is preserving it. If you drop below that range, the result becomes much less stable at room temperature and should be treated as a refrigerated preserve rather than a pantry staple. The liquid that forms in the jar is umezu, and I treat it as part of the batch, not waste.
That balance explains why umeboshi is worth making in the first place. You are not chasing a snack; you are making a concentrated seasoning with enough personality to carry a bowl of rice on its own. Once that makes sense, the ingredient list stops looking intimidating and starts looking precise.
Ingredients and equipment for a dependable batch
For a first batch, I prefer to think in weights, not loose handfuls. That keeps the salt ratio honest and makes scaling easy if you decide to make more later.
| Ingredient or tool | Amount for 1 kg ume | Why it matters | UK note |
|---|---|---|---|
| Ripe ume | 1 kg | This is the base fruit for the pickle. | Look for yellow, fragrant fruit; if it is still slightly green, let it ripen at room temperature for 2-3 days. |
| Coarse sea salt | 180 g | Salt draws out moisture and preserves the plums. | Use coarse salt, not table salt. |
| Red shiso leaves | About 200 g leaves, optional | Adds colour and the familiar shiso aroma. | If you cannot source it cleanly, skip it and make white umeboshi instead. |
| Shochu or vodka | 40-60 ml | Useful for sterilising the jar, lid, and any weights. | Use a high-proof spirit rather than flavoured alcohol. |
| Glass jar or ceramic crock | 1 large vessel, about 2-3 litres | Holds the fruit under pressure while the brine forms. | A wide mouth makes layering and weighting much easier. |
| Pickling weight | Enough to keep the fruit compressed | Keeps the plums submerged in the brine. | A proper weight is best; a clean small jar can work in a pinch. |
If you are buying in the UK, I would plan around specialist Japanese grocers or seasonal fruit sellers rather than expecting ume to appear casually in a normal supermarket. That extra effort is normal here, and it is one reason a small, carefully made batch makes more sense than trying to scale up too early.
How I make a first batch step by step
Prepare the fruit
Choose firm, ripe ume with a yellow colour and a pleasant aroma. Remove the stems carefully, then wash the fruit gently and dry every piece completely. I do not rush this part: any moisture left on the skin can make the jar harder to manage later.
If the fruit is still slightly green, leave it at room temperature until it turns yellow and softens a little. That waiting time is worthwhile, because unripened fruit gives a harsher result and tends to behave less predictably in the jar.
Layer and weigh it down
Wipe the jar, lid, and weight with shochu or vodka to reduce contamination. Put a thin layer of salt on the bottom, then add a layer of ume, followed by more salt. Keep alternating until everything is in the jar, and finish with a final layer of salt on top.
Press the fruit down with the weight and keep the jar in a cool, dark place. Over the next 2-7 days, the salt should draw out enough liquid to cover the plums. If the brine does not rise enough, increase the pressure slightly rather than opening the jar again and again.
Add red shiso if you have it
Red shiso usually arrives later in the season, so I often let the fruit sit in brine until the leaves are available. Strip the leaves from the stems, rinse them, drain well, and knead them with salt to draw out the bitterness. The dark liquid that comes off first is discarded, then the leaves are kneaded again with the remaining salt.
Once the shiso is well prepared, add a little umezu from the jar to the bowl with the leaves. The liquid turns a deep red-purple quickly, which is exactly what you want. Pour the shiso and its liquid back over the plums, spread the leaves evenly, and reset the weight. If you cannot get shiso, skip this stage and continue to drying; you will have a paler but still very good white umeboshi.
Dry the plums in the sun
Choose three dry, sunny days in a row if you can. Spread the plums in a single layer on a clean bamboo tray, rack, or sieve and leave them in full sun during the day. Bring them in at dusk, then repeat the next day. That drying stage tightens the skin, concentrates the flavour, and gives umeboshi its classic wrinkled finish.
I would rather wait for proper weather than force this step on a damp day. In a British summer, that discipline matters more than heroic optimism. Once the fruit is dry, return it to the jar with a little of the brine and let it rest before using it.
Read Also: Japanese Root Vegetables - Master Sides, Soups & Pickles!
Let the flavour settle
You can taste a piece soon after drying, but the flavour improves after a short rest. A few weeks is enough to round off the edges; longer ageing softens the harshness even more. Traditional batches can keep for years when salted correctly and stored well, and many cooks treat older plums as the best ones of all.
The mistakes that ruin a batch and how to avoid them
- Using too little salt - if you go below 18% by weight, the batch becomes much less reliable for room-temperature storage.
- Leaving fruit above the brine - any exposed plum is an invitation to mould, so keep the fruit fully submerged.
- Using wet tools or a dirty jar - moisture and residue are the easiest ways to turn a careful preserve into a problem.
- Skipping the shiso knead - if you use red shiso, the rubbing and salting step removes bitterness and improves the colour.
- Rushing the drying stage - the sun-drying is part of the texture and the flavour, not an optional flourish.
- Confusing salt crystals with mould - white salt crystals are hard and grainy; fuzzy, film-like growth is a different matter.
If you do spot fuzzy mould, I would not ignore it. Small localised growth can sometimes be removed with a sterilised spoon and the area wiped with high-proof alcohol, but if the smell is off or the mould is spreading, the sensible move is to stop trusting that batch. That is not paranoia; it is basic preserve-making discipline. The cleaner the process, the less drama you have later.
How to serve and store it in everyday meals
Umeboshi earns its place because a little goes a long way. I use it as a sharp accent rather than a main ingredient, which is exactly how it behaves best.
- With steamed rice - one whole plum or half a plum can season a plain bowl beautifully.
- In onigiri - remove the pit, chop the flesh finely, and use about 1 teaspoon per rice ball.
- With soups and tofu - a small amount of chopped ume cuts through richness in miso soup, hiyayakko, or ochazuke.
- In bento - one plum helps balance plain rice, fish, vegetables, and egg dishes without making the box feel heavy.
- In dressings - half a plum mashed into oil and vinegar is enough for a bright, salty-sour salad dressing.
For storage, traditional high-salt umeboshi belong in a cool, dark cupboard, where they can keep for years. Lower-salt versions need refrigeration and should be treated more like a short-lived preserve. I would also keep the leftover umezu: it is useful in dressings, quick pickles, and anywhere you want that salty-sour edge without opening another jar.
The first batch I would make in a UK kitchen
If I were making this at home in the UK, I would start small: 1 kg ripe ume, 180 g coarse sea salt, a sterilised glass jar, and red shiso only if I could source it fresh. That size is large enough to teach you the process properly, but small enough that a mistake does not waste a huge batch.
The British variable is weather, not method. If you can line up ripe fruit with a dry spell and keep the salt ratio strict, homemade umeboshi becomes a very manageable project. The result is one of the most useful condiments in Japanese home cooking: sharp, savoury, long-lasting, and perfectly suited to rice, soups, and bento for months to come.