A Halloween bento works best when it is fun first and decorative second: the lunch still needs to hold its shape, taste good after transport, and feel sensible for school or work. I usually treat it as a small composition problem rather than a craft project. In this guide, I cover the balance that makes it work, the ingredients that stay neat, how I build one quickly, and the practical limits that matter in the UK.
The essentials for a spooky lunch box that still eats well
- Build around one main item, two sides, and one visual accent.
- Orange, black, white, and green give the quickest seasonal look without extra effort.
- Use edible decoration first: nori, cheese, egg, carrot, cucumber, and black sesame.
- Prep the themed pieces the night before so morning assembly takes about 10 to 20 minutes.
- For school lunches, check nut policies and keep everything chilled until it is packed.
What makes a themed lunch feel like bento culture
I start from bento logic, not from the theme. Japanese lunch boxes are built around tidy portions, visual balance, and food that still looks inviting at midday. The Halloween layer works because it sits on top of that structure instead of replacing it.
Kikkoman’s seasonal decoration bento is a good example of the idea in practice: the pumpkin motif is built from real lunch components, not from separate novelty items. I think that distinction matters, because the best themed lunches are the ones you can actually eat without fighting the layout.
When I plan one, I still think in the old bento formula:
- Staple food: rice, onigiri, bread, noodles, or pasta.
- Protein: tamagoyaki, chicken, tofu, fish cakes, or cheese.
- Vegetable side: cucumber, broccoli, carrots, edamame, or sweetcorn.
- Fruit: grapes, pear, apple, kiwi, or mandarin.
- One accent: nori, black sesame, cheese cut-outs, or a pumpkin shape.
Themed lunches work best when only one or two parts carry the seasonal idea. If everything is spooky, the box usually looks busy rather than charming. Once the structure is settled, the ingredient palette becomes much easier to choose.
The ingredient palette that gives you the Halloween look
If you want the box to read as seasonal without turning into a pile of props, choose ingredients that give you contrast. I prefer foods that cut cleanly, sit well at room temperature, and survive a little handling. That usually means strong colours, firm textures, and shapes that can be adjusted with a cutter or scissors.
| Ingredient | Best use | Why it helps |
|---|---|---|
| Rice or onigiri | Pumpkin base, ghost shape, or plain backdrop | It holds shape well and makes the theme read instantly |
| Tamagoyaki | Mummy wraps, yellow blocks, or neat slices | It is sturdy, lightly sweet, and easy to portion |
| Nori | Eyes, mouths, bats, and spider legs | It gives sharp contrast without adding moisture |
| Cheese | Ghost cut-outs, moons, and bandages | It is easy to punch and familiar in most lunch boxes |
| Carrot, squash, sweet potato | Orange colour and autumn flavour | These ingredients make the box feel seasonal rather than sugary |
| Cucumber, broccoli, edamame | Green contrast and crunch | They stop the box from looking too sweet or one-note |
| Grapes, apple, pear | Fresh filler and colour break | They finish the box neatly without making it fussy |
What I avoid is just as important: watery tomato slices, limp lettuce, anything creamy that can leak, and bulky sweets that crush the arrangement. If you want a sauce, pack it separately; if you want colour, use shape first and garnish second. With those ingredients in mind, the fun part is deciding what kind of box to build.
Three box concepts I would actually pack
When people ask me for inspiration, I usually steer them toward three formats. They cover most needs, from a child’s school lunch to a more restrained office box, and none of them depend on rare tools or complicated carving.
| Concept | What it looks like | What goes inside | Why it works |
|---|---|---|---|
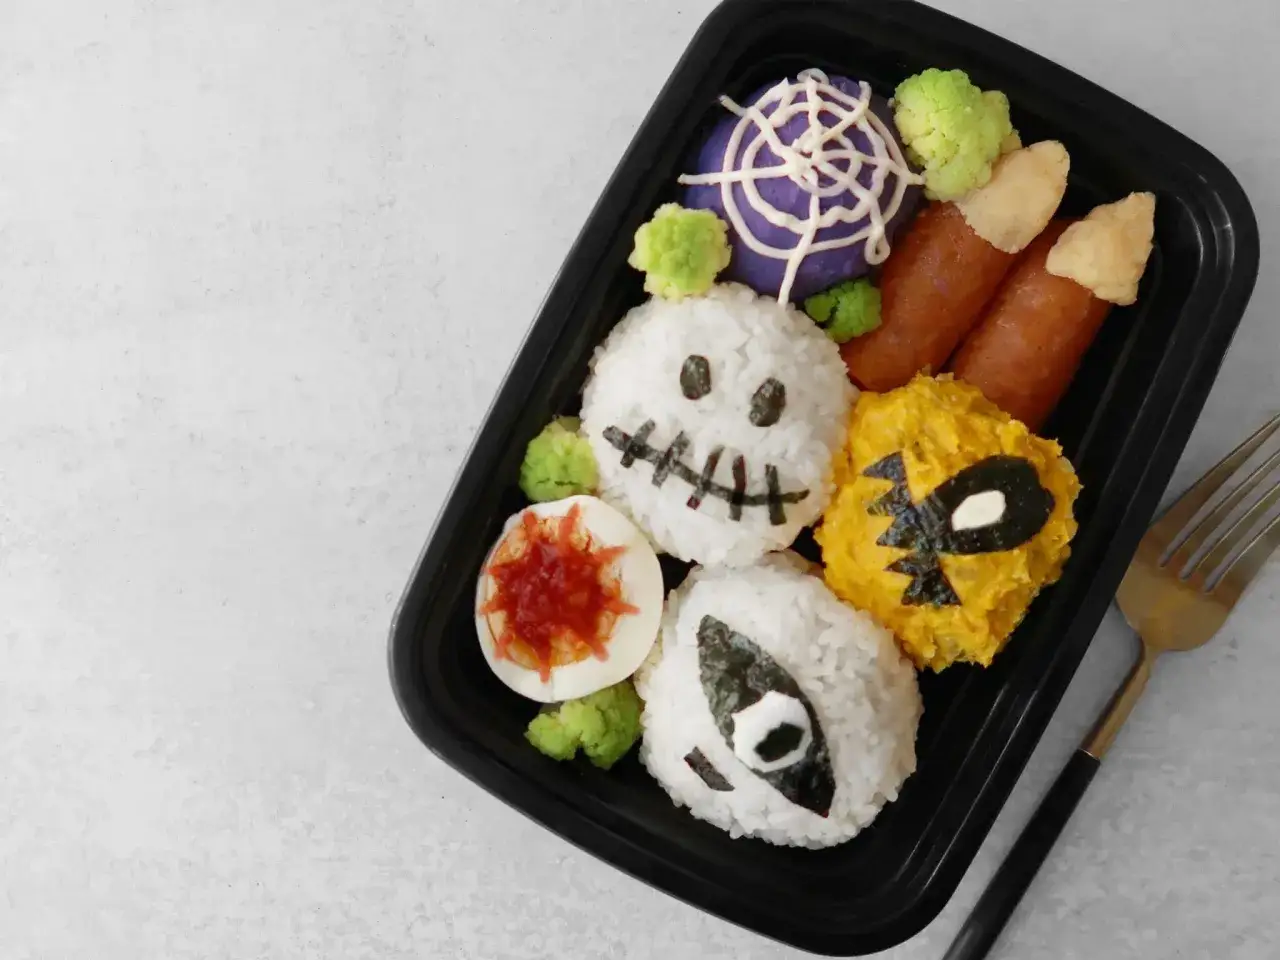
| Pumpkin rice box | An orange centrepiece with one clear seasonal motif | Rice or onigiri, tamagoyaki, broccoli, carrot, grapes | It reads instantly and stays tidy in transit |
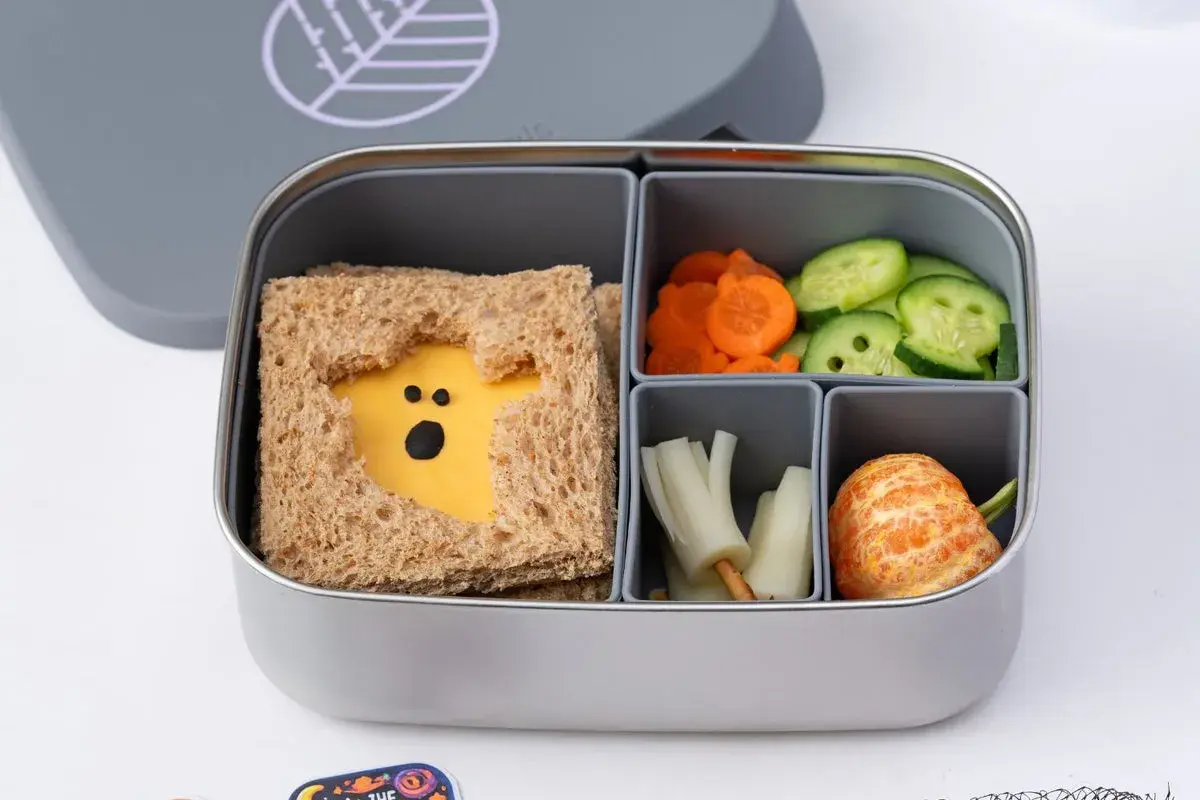
| Ghost sandwich box | Simple pale shapes with dark nori faces or outlines | Bread, cheese, ham or tofu, cucumber, apple | It is beginner-friendly and easy to assemble quickly |
| Muted autumn box | Seasonal, but less cartoonish | Sesame rice, roasted squash, chicken or tofu, edamame, pear | It suits older children and adults who want the theme without the clutter |
If I only have time for one flourish, I make the main item seasonal and leave the rest straightforward. That keeps the lunch from looking overworked, and it also makes the food more appealing once the novelty has worn off. Once you pick a concept, the assembly process stays pleasantly simple.
How I build one in 15 to 20 minutes
My fastest version takes 15 to 20 minutes if the main components are already cooked. If I am starting from scratch, I prep the decorative pieces the night before and cut the morning assembly down to about 10 minutes. A small cutter set, kitchen scissors, silicone cups, and a nori punch are enough; I would not buy a bag of novelty accessories unless I planned to use them often.
- Pick one base: rice, onigiri, bread, noodles, or pasta.
- Add the protein and one cooked vegetable side.
- Place the visual centrepiece first, because that sets the rest of the layout.
- Fill the gaps with fruit or extra vegetables so nothing slides around.
- Add faces, cut-outs, or other small decorations last.
- Chill the box, close it, and pack it tightly so the arrangement survives the journey.
If I batch-cook rice and roast vegetables once, I can usually put together three themed boxes in about 45 minutes on a Sunday. That is the point where the idea stops feeling like extra work and starts feeling like a repeatable routine. The final step is making sure the design matches the setting, because school and office lunches play by slightly different rules.
What changes for school, work, and food safety
The setting changes the design more than most people expect. In many UK schools, I would treat a nut-free lunch as the default unless the school says otherwise, and I would keep the box easy to open, easy to eat, and free from hard decorations or fiddly picks. For office lunches, I can be a little bolder with flavour and presentation, but I still keep the layout clean enough to eat at a desk without a mess.
| Setting | What to prioritise | Best choices | What to avoid |
|---|---|---|---|
| School lunch | Nut-free, low mess, easy opening | Onigiri pumpkins, sandwich ghosts, fruit, crisp vegetables | Loose toothpicks, runny dips, hard sweets, overcomplicated decoration |
| Office lunch | Sturdy flavours, neat presentation, optional reheating | Tamagoyaki, roasted squash, chicken or tofu, black sesame, pickles | Too much novelty styling, sugary filler, and anything that collapses after lunch |
The Food Standards Agency says cooked food should be cooled and put in the fridge within one to two hours, so I treat temperature control as part of the design rather than an afterthought. An ice pack matters more than a cute pick when the lunch will sit in a school bag or on a desk. If a box has to travel, firm ingredients and simple layering do more for quality than any decoration trick. From there, the final polish is mostly about restraint.
The small choices that make October lunches feel finished
The boxes I remember most are rarely the most elaborate ones. They are the ones where one idea is clear, the colours make sense, and the food still looks appetising at 1 p.m. I lean on a few rules every time: keep one hero motif, stick to three main colours, and let texture do more work than decoration.
- Use one focal point. A pumpkin, ghost, or bat is enough.
- Repeat a colour on purpose. Orange and black read as seasonal very quickly.
- Prefer dry top layers. Nori, cheese, and egg decorations hold better than wet toppings.
- Fill gaps tightly. A well-packed box travels better and looks sharper.
- Repeat a format you can make again. The best themed lunches are the ones you can pack more than once.
That is the standard I use for a good Halloween bento: it should look seasonal, travel well, and still feel like lunch once the novelty wears off. If the box does all three, the design is doing real work rather than just taking up space.