Traditional Japanese rice crackers are all about contrast: a firm rice base, a blistered surface, and seasoning that stays clean rather than heavy. In this guide I show the version I trust at home, explain the difference between senbei, okaki, and arare, and walk through the small decisions that decide whether the result is light and snappy or flat and chewy. I also add UK-friendly ingredient notes, seasoning ideas, and the quickest way to keep the crackers crunchy.
The practical version at a glance
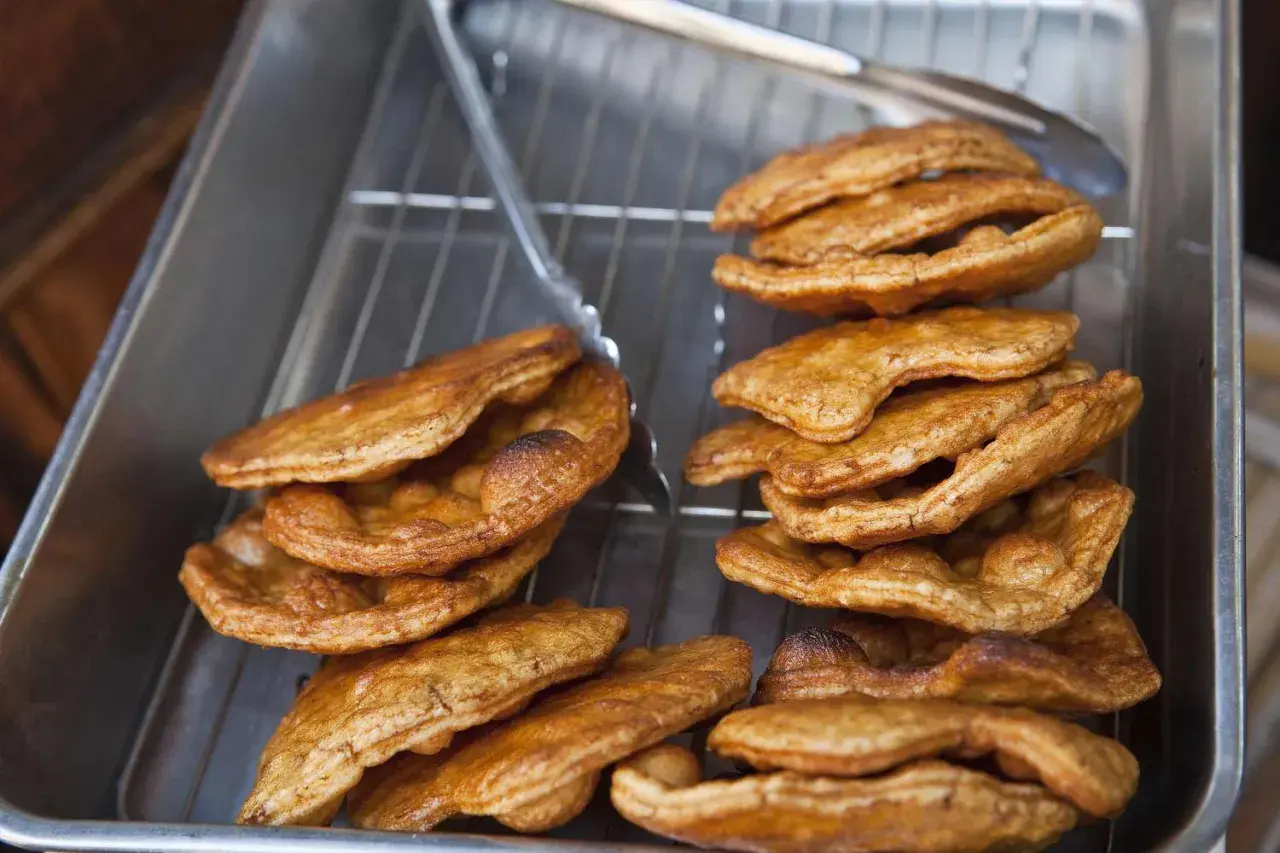
- This recipe makes kakimochi-style okaki, the mochi-based rice cracker that is easiest to reproduce at home.
- The key step is drying the mochi for 7-10 days until it is hard, cracked, and flaky on the surface.
- Frying at about 170°C gives the lightest puff; baking is a workable fallback if you want less oil.
- Season the crackers while they are still hot so salt, soy sauce, or furikake sticks properly.
- Use plain kirimochi from a Japanese or Asian shop rather than trying to improvise with soft rice, which will not behave the same way.
What Japanese rice crackers are and which version this recipe makes
When I talk about Japanese rice crackers, I separate them into three useful families. Senbei are the flat, usually baked or grilled crackers made from non-glutinous rice; okaki are made from mochi or glutinous rice; and arare are the smaller bite-sized pieces in the same mochi-based family. That distinction matters, because the ingredient list and the cooking method tell you what texture you should expect before you even turn on the hob.
| Type | Base | Texture | Usual method | What it is best for |
|---|---|---|---|---|
| Senbei | Uruchimai, or non-glutinous rice | Flat, crisp, drier snap | Baked or grilled, often glazed with soy sauce | Tea snacks and the classic store-bought style |
| Okaki | Mochi or glutinous rice | Chunky, puffed, airy crunch | Air-dried, then fried or baked | Simple home cooking with a strong traditional feel |
| Arare | Mochi, cut smaller | Tiny, sharp crunch | Same method as okaki, just smaller pieces | Snack mixes, tea-time nibbling, furikake-style blends |
The recipe below makes okaki, specifically kakimochi-style crackers, because that is the version I find most realistic for a home kitchen. If you want the flatter senbei shape later, the technique changes more than most people expect, so it helps to master this one first. Once the style is clear, the ingredient list makes much more sense.
Ingredients that matter in a UK kitchen
I keep the ingredient list short on purpose. There is nowhere for a rice cracker to hide, so freshness, dryness, and the quality of the seasoning do most of the work.
| Ingredient | Amount | Why it matters |
|---|---|---|
| Kirimochi | 4 pieces, about 200 g total | This is the base. It dries into a crackly surface and puffs properly when heated. |
| Neutral oil | Enough for a 2 cm layer in the pan | Use sunflower or rapeseed oil in the UK. A neutral oil lets the rice flavour stay clean. |
| Fine sea salt | To taste | The simplest seasoning, and the one I use most often when I want the rice itself to lead. |
| Soy sauce or tamari | 1-2 tsp for the batch, brushed lightly | Adds savoury depth, but too much will soften the crunch. |
| Furikake, nori, sesame, shichimi | Small pinches | Optional extras that keep the flavour profile Japanese without making the crackers heavy. |
UK note: plain kirimochi is the ingredient to look for in Japanese or Asian grocers. I would not replace it with fresh sticky rice or leftover cooked rice for this version; the dryness of the mochi is what gives the crackers their structure. With the ingredients sorted, the real work is in drying and heat control.
How to make them step by step
This is a small recipe, but it rewards patience. The drying stage looks slow, then the frying stage moves quickly, so I keep a tray, a thermometer, and a rack ready before I start.
- Slice the mochi thinly. Cut each kirimochi into pieces about 3 mm thick. If the cake is very firm, use the heel of your knife and work carefully rather than forcing it.
- Dry the pieces fully. Lay them in a single layer on a rack or tray with good airflow and leave them for 7-10 days, until the surface looks cracked and flaky. If the pieces bend, they are not ready yet. I would not rush this stage, because under-dried mochi can splutter in the oil and finish dense instead of airy.
- Heat the oil gently. Aim for about 170°C. Add a few pieces first and watch what they do. They should puff, not immediately darken.
- Fry in small batches. Turn the crackers constantly so they colour evenly. Do not overcrowd the pan, or the oil temperature will drop and the crackers will absorb more oil than they should.
- Drain and season straight away. Lift the crackers onto kitchen paper or a rack, then season while they are still hot. Salt, furikake, or a very light brush of soy sauce all work well.
If you prefer to avoid deep-frying, a baked shortcut also works: bake the dried pieces until crisp and golden, then season them immediately. The texture is a little leaner and less puffed, but it still makes a useful everyday snack. After that, flavouring is where you can keep things traditional or make them your own.
Seasonings that keep the flavour balanced
The biggest mistake I see with homemade rice crackers is over-seasoning. A good cracker should still taste like rice first, with the seasoning acting as the accent rather than the whole performance.
- Salt is the cleanest option. I like fine sea salt because it coats evenly and keeps the finish bright.
- Soy sauce gives deeper umami, but I brush it on lightly after frying. If you soak the crackers, they lose their crisp edge too quickly.
- Furikake is the easiest all-round choice when you want seaweed, sesame, and a little savoury complexity without fuss.
- Shichimi togarashi should be used with restraint. A pinch sharpens the flavour; too much takes over the whole cracker.
- Nori works best as a small wrap or strip. It adds aroma and makes the crackers feel a bit closer to the shop-bought classic.
- Kinako is useful if you want a slightly sweet finish, but it pushes the snack away from the savoury side of the spectrum.
For a bento-style snack, I keep the seasoning milder than I would for tea time, because strong soy or chilli flavours can dominate a packed lunch. Once you know how you want them to taste, the next challenge is avoiding the small mistakes that kill the crunch.
The mistakes that ruin the crunch
These are the errors that make homemade rice crackers feel disappointing even when the ingredients are good. They are easy to avoid once you know what to look for.
- Cutting the mochi too thick. Anything much thicker than 3 mm takes longer to dry and tends to brown unevenly.
- Skipping the full drying time. Moisture is the enemy here. If the mochi still feels a little flexible, the finished cracker will not puff properly.
- Using oil that is too hot. The outside can brown before the inside expands. Medium heat gives you a lighter, cleaner crackle.
- Overcrowding the pan. Too many pieces at once lower the oil temperature and make the batch greasy.
- Brushing on too much soy sauce. The crackers should be seasoned, not soaked. A thin layer is enough.
- Storing them while warm. Trapped steam softens the surface, and once that happens, the crunch is hard to recover.
If your kitchen is especially humid, give the crackers an extra day of drying rather than trying to rescue them after frying. Once the texture is right, the last piece is learning how to serve and store them so they stay worth eating.
How to serve and store them without losing the snap
I like these crackers with hot green tea, but they also make sense beside a rice-forward meal when you want a dry, savoury bite after something richer. After a donburi, for example, a plain cracker can give you the crunch that the bowl itself does not provide. That is one reason I keep a jar of them around when I am cooking Japanese home food.
- Serve them the same day if you can. That is when the texture is at its best.
- Store them in an airtight container once they are completely cool. A dry tin or jar is better than a soft bag.
- Keep them away from humidity and never put them in the fridge, which tends to dull the texture.
- Re-crisp them briefly in a low oven if they soften. A few minutes is usually enough; anything longer risks over-browning.
- Pack them separately for bentos if you want to keep the crunch. A dry compartment or wrapper works better than mixing them with moist food.
At that point the recipe becomes less about following steps and more about choosing which version of the snack you want to repeat. I would rather have a small batch that stays crisp than a bigger batch that goes soft on the second day.
Why I keep this version on repeat
I keep coming back to this method because it respects what the snack is supposed to be: simple rice, controlled drying, and just enough heat to turn a plain ingredient into something sharp and savoury. Once the base is right, you can move in two directions. Stay minimal with salt and nori, or push it toward soy, sesame, and shichimi without losing the character of the cracker. That balance is what makes homemade rice crackers feel genuinely Japanese rather than just rice-flavoured snacks.
If I were serving them after a donburi, I would keep the crackers plain and let the bowl do the heavy lifting. For tea-time or a bento snack, I would season a second batch a little more boldly, because the crunch is what carries the flavour. When the drying, heat, and seasoning all line up, this becomes one of those small recipes I trust to work again and again.